When a student's balance runs low, you have two options: wait for them to notice, or send a payment request. TeachersFlow lets you do both — automatically and manually.
How Payment Requests Work
A payment request is a notification to the student that they need to pay for upcoming lessons. Here's the flow:
- You create a request — specifying the number of lessons to pay for
- The student sees it in their portal under Payments
- The student pays (via bank transfer, cash, or any method you agree on) and marks it as "Paid"
- You confirm the payment — the student's balance updates automatically
The system calculates the amount based on the student's lesson price × number of lessons.
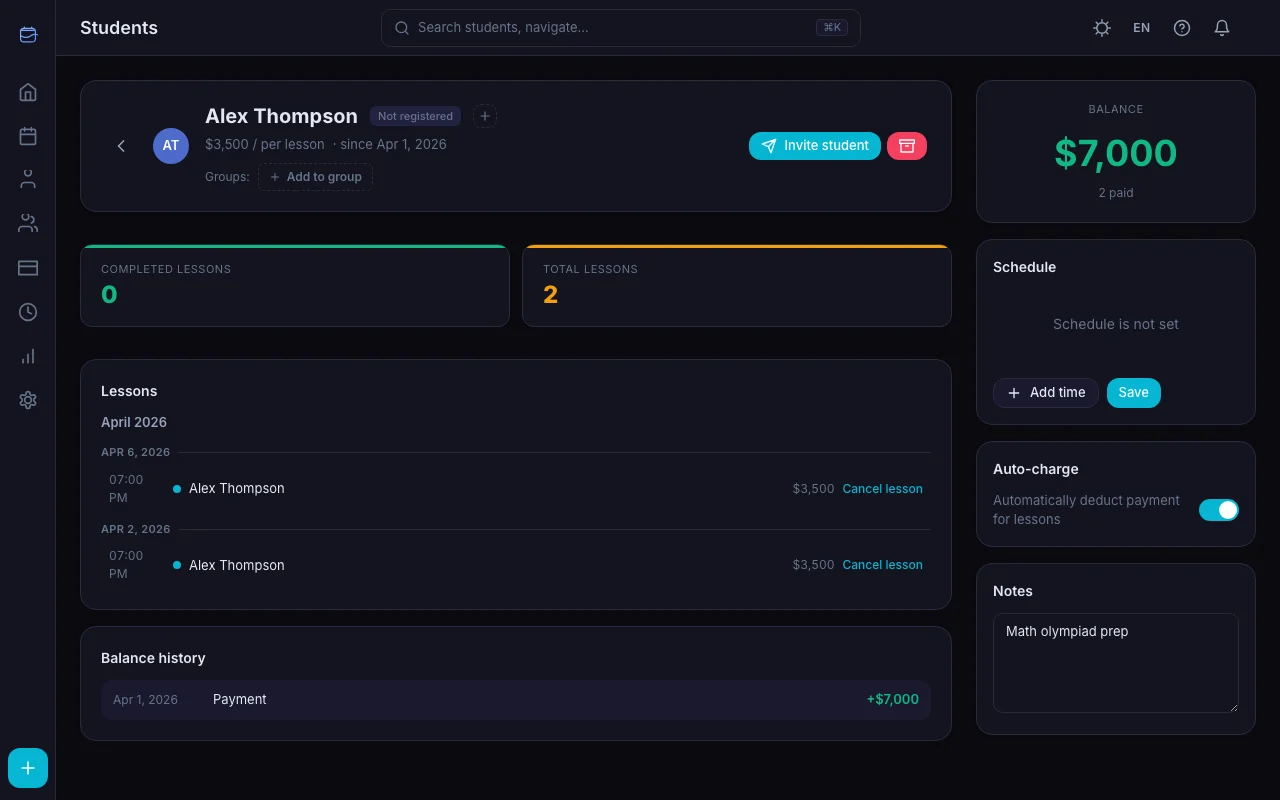
Creating a Payment Request
- Go to the student profile
- Navigate to the Payments section
- Click Request Payment
- Set the number of lessons (or amount)
- Click Send
The request is created with status Pending and appears in both your view and the student's portal.
What the Student Sees
In their student portal, the student sees:
- A pending payment with the amount
- The number of lessons it covers
- A button to mark it as Paid
When the student has transferred the money (via their preferred method), they click "Paid." This notifies you that they've completed the payment on their end.
Confirming the Payment
Once the student marks a payment as paid, you see a notification. To confirm:
- Go to the student's Payments section (or click the notification)
- Review the payment details
- Click Confirm
Confirming the payment: - Updates the student's balance (adds the payment amount) - Records the transaction in balance history - Changes the payment status to Confirmed
Automatic Payment Requests
TeachersFlow can also create payment requests automatically — see How to Automate Payment Reminders. When a student's balance drops to zero or below (depending on their payment model), the system creates a pending payment request.
This means: - Students with auto-charge enabled who run out of balance → automatic request appears - Students see the request in their portal without you lifting a finger - You still need to confirm once they pay — see How to Track Payments for the full payment flow
Payment Models
The request workflow adapts to your payment model:
Prepayment (Balance Model)
Most common for tutors. Student pays for multiple lessons upfront. When balance gets low → request goes out → student pays → you confirm → balance replenishes.
Per-Lesson
Student pays after each lesson. The request reflects the cost of the last lesson or batch of lessons.
Monthly
Student pays a fixed monthly amount. The request reflects the monthly total.
Student-Initiated Payments
Students can also submit payments proactively through their portal:
- Student opens portal → Payments
- Clicks Submit Payment
- Enters the number of lessons or amount they're paying for
- You receive a notification
- You confirm once you've received the money
This saves you the step of creating the request — the student takes initiative.
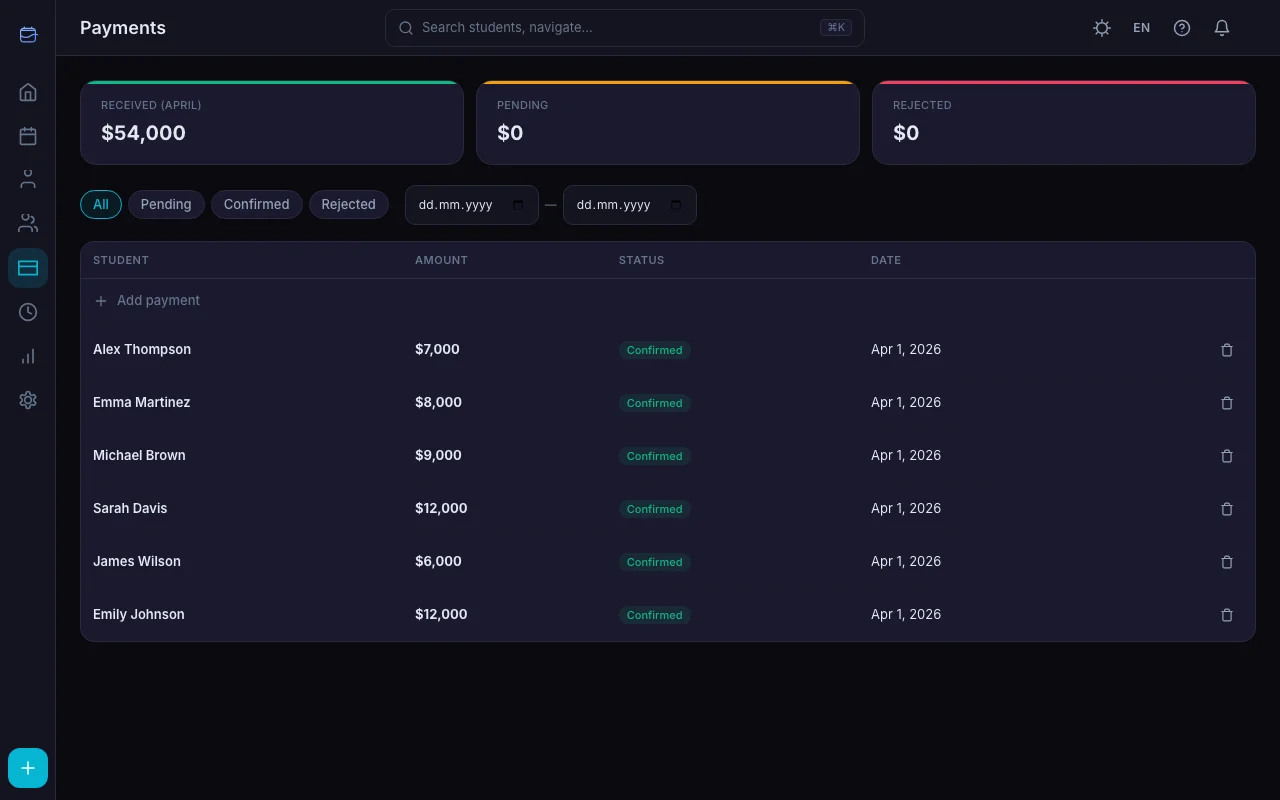
Payment Status Flow
| Status | Meaning |
|---|---|
| Pending | Request created, waiting for student to pay |
| Paid | Student marked as paid, waiting for your confirmation |
| Confirmed | You confirmed — balance updated |
| Cancelled | Request cancelled (by you) |
| Rejected | Payment rejected (by you) |
Tips
Set lesson prices first. Payment requests calculate amounts from the student's configured lesson price. Make sure it's set before sending a request.
Use auto-charge to reduce manual requests. With auto-charge enabled and prepayment balance, the system handles most billing automatically. Manual requests are for special cases.
Confirm promptly. Students waiting for confirmation can't see their updated balance. The sooner you confirm, the better their portal experience.
Check pending payments periodically. The dashboard shows a "Pending Payments" count. If it's climbing, follow up with students.
Get Started
Open TeachersFlow, go to any student's profile, and try sending a payment request.
14 days of full Pro access — no card required.