Your students don't just exist in a spreadsheet. In TeachersFlow, every student gets their own portal — a personal space where they can check their schedule, track their balance, and submit payments. No extra apps, no back-and-forth messages.
Here's what your students see and how it works.
How Students Access the Portal
The process is simple — see the full walkthrough in How to Invite Students to TeachersFlow:
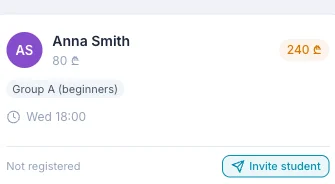
- You click Invite on a student's card in your Students page.
- TeachersFlow generates a unique invite link.
- Share it via WhatsApp, email, or any messenger you prefer.
- The student clicks the link, creates an account (or signs in if they already have one), and accepts the invitation.
Once connected, the student lands in their portal — a separate interface designed just for them.
The Portal Layout
The student portal has three main tabs accessible from the left sidebar:
- Calendar — monthly view of all their lessons with you
- Profile — balance overview, lessons, balance history, payment history, and weekly schedule
- Settings — profile, general settings, notifications, and security
Across all tabs, the top bar shows the page title, a "Student Portal" badge, notification bell, theme/language toggles, and the user menu.
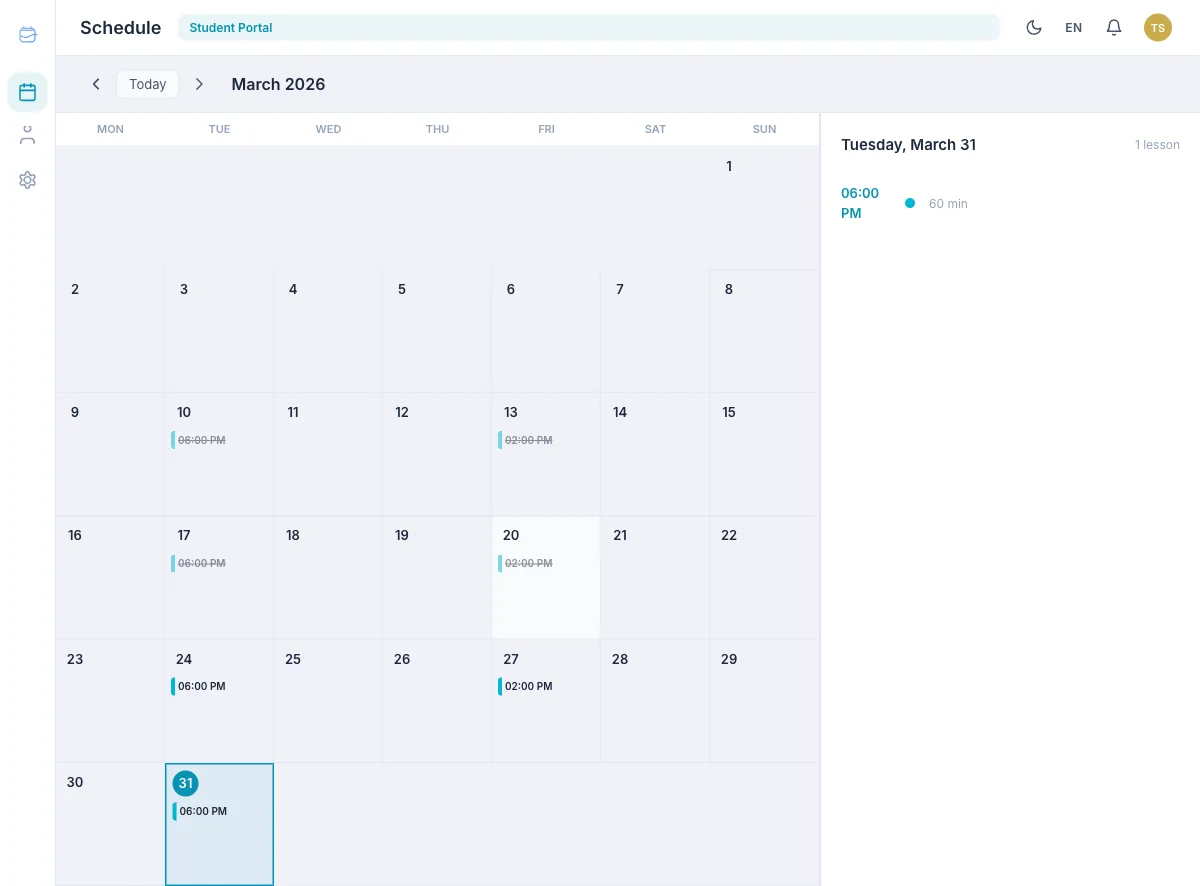
Calendar Tab
Students see a monthly calendar with their lessons displayed as colored dots on each day. They can:
- Navigate between months
- Click any day to see lesson details in a side panel
- See lesson statuses: Scheduled, Completed, or Cancelled
No editing — students can view their schedule but can't change it. Only the teacher manages lessons.
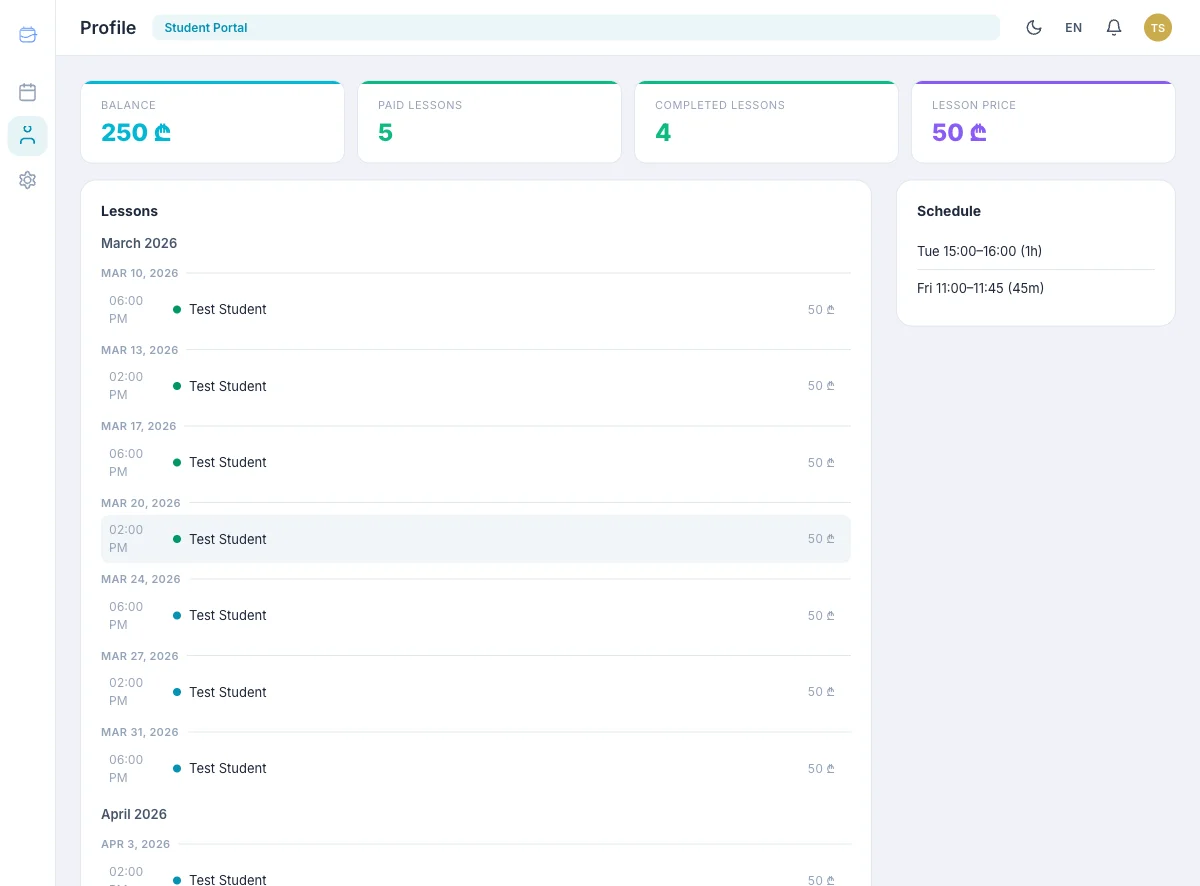
Profile Tab — The Core
This is where the real value lives. At the top, four cards give the student an instant overview:
| Card | What it shows |
|---|---|
| Balance | Current account balance (positive = credit, negative = owes money) |
| Paid Lessons | How many lessons their current balance covers |
| Completed Lessons | Total lessons they've had with you |
| Lesson Price | What you charge them per lesson |
Below that, three sections:
Lessons
A chronological list of all lessons, grouped by month. Each entry shows the date, time, and status. This gives the student a clear picture of what's been done and what's coming up.
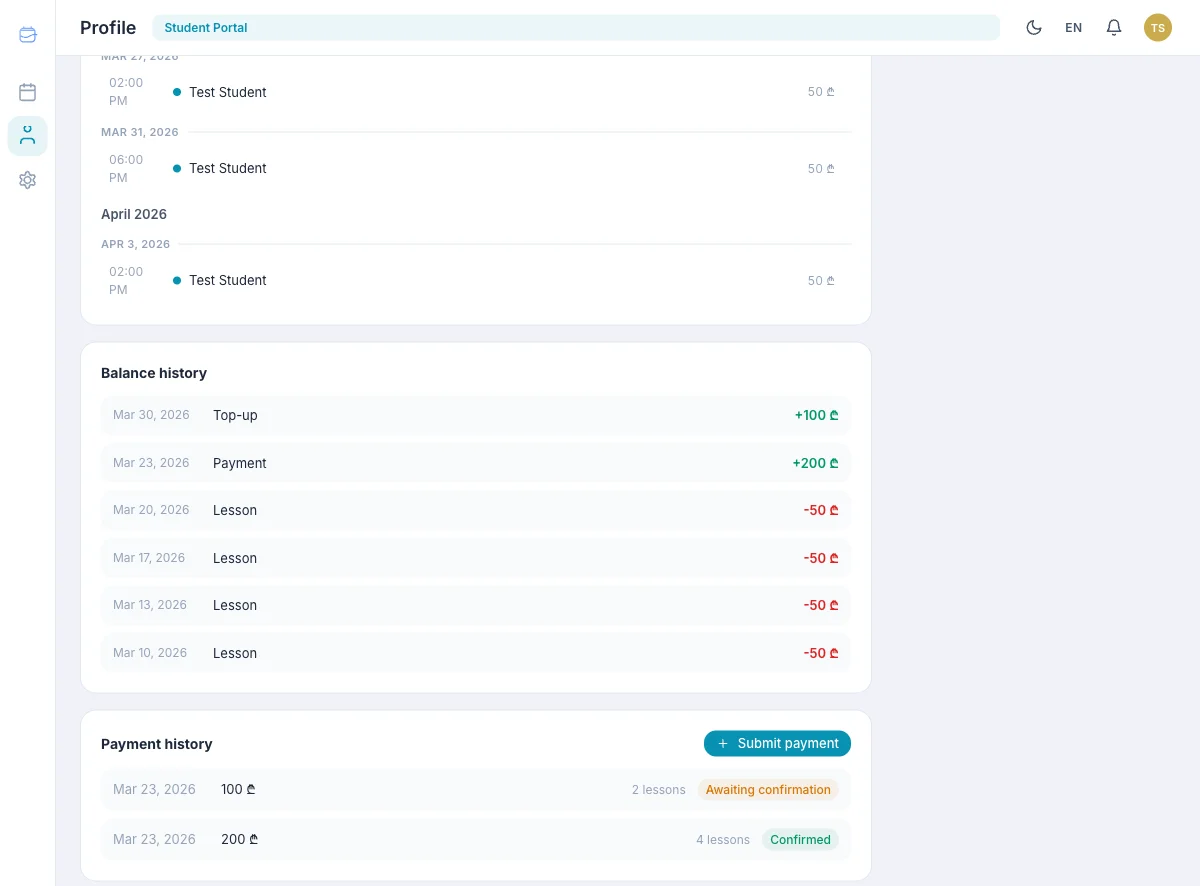
Balance History
Every change to the student's balance is logged here:
- Lesson — balance decreased after a completed lesson
- Payment — balance increased after a confirmed payment
- Top-up — student submitted a self-reported payment
- Lesson cancellation — balance refunded
- Manual adjustment — teacher made a manual correction
Think of it as a bank statement for tutoring.
Payment History
Shows all payments with their statuses:
- Pending — payment created but not yet submitted by student
- Awaiting confirmation — student marked it as paid, teacher hasn't confirmed yet
- Confirmed — teacher verified the payment
- Rejected — teacher rejected the payment claim
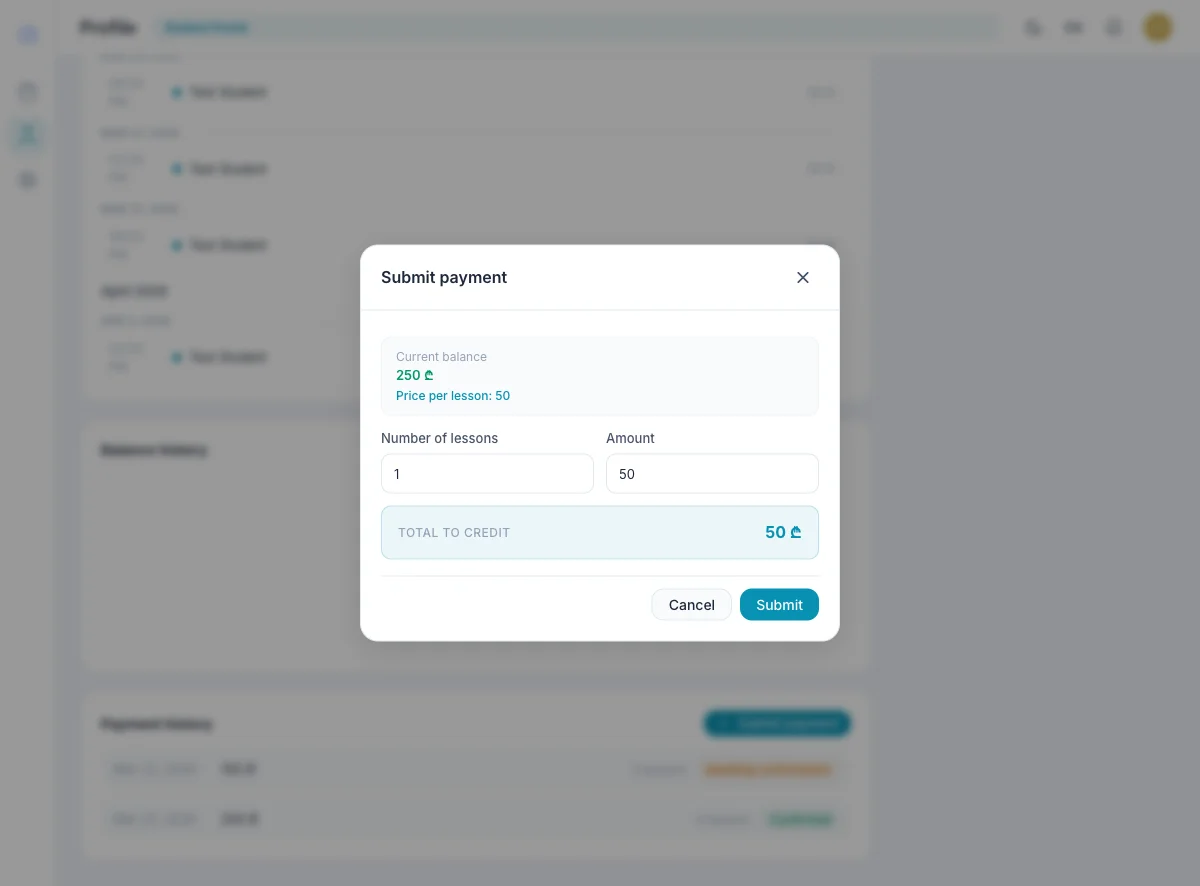
How Students Submit a Payment
When a student needs to pay, they click Submit Payment in the Payment History section. A modal opens with:
- Current balance — so they know where they stand
- Lesson price — for reference
- Number of lessons — they choose how many lessons to pay for
- Amount — auto-calculated from lesson count, or they can enter a custom amount
After clicking Submit, the payment appears with "Awaiting confirmation" status. You'll get a notification and can confirm or reject it from your Payments tab.
The student takes care of the transfer (bank, card, cash — whatever you agreed on), and the portal just tracks the flow. No payment processing, no fees — just clear records for both sides. For the teacher side of the same flow, see How to Track Payments in TeachersFlow and How to Send a Payment Request.
There Is No Separate Payments Tab for Students
In the student UI, Profile already includes everything related to payments and balance:
- four balance overview KPI cards
- balance history
- payment history and the Submit Payment button
- recurring weekly schedule in the right column
The language toggle is in the top bar and works across all tabs, not only in Profile.
Why the Portal Matters
Without a portal, every interaction goes through you:
- "When's my next lesson?" — you check and reply.
- "How much do I owe?" — you look it up and send a number.
- "Did my payment go through?" — you confirm manually.
With the portal, students answer these questions themselves. You save time. They feel in control. Everyone's happier.
If you're brand new to TeachersFlow, start with Get Started with TeachersFlow in 5 Minutes and then come back to invite your first student.
Set It Up in 30 Seconds
- Open TeachersFlow
- Go to Students → click a student card
- Click Invite → copy the link → send it to your student
- Done. They now have their own portal.
14 days of full Pro access — no card required.