
You just discovered TeachersFlow and want to try it out. Here's how to go from zero to a fully working tutor CRM in under five minutes — no credit card needed.
Step 1: Create Your Account
Go to app.teachersflow.app and click Create an account.
Fill in your name, email, and password (8+ characters). You'll get a 6-digit verification code in your inbox.
After signing up, select the teacher role on the welcome screen. This sets up your account with the full tutor dashboard.
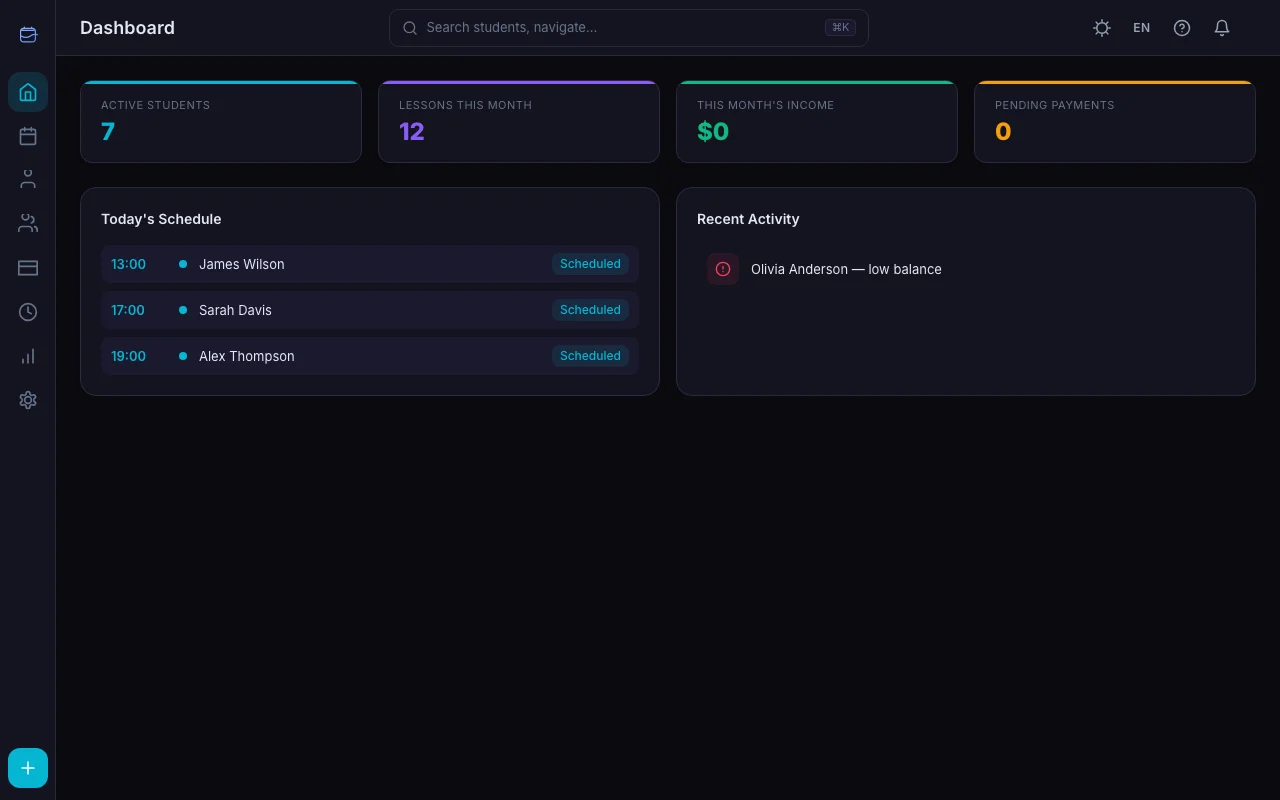
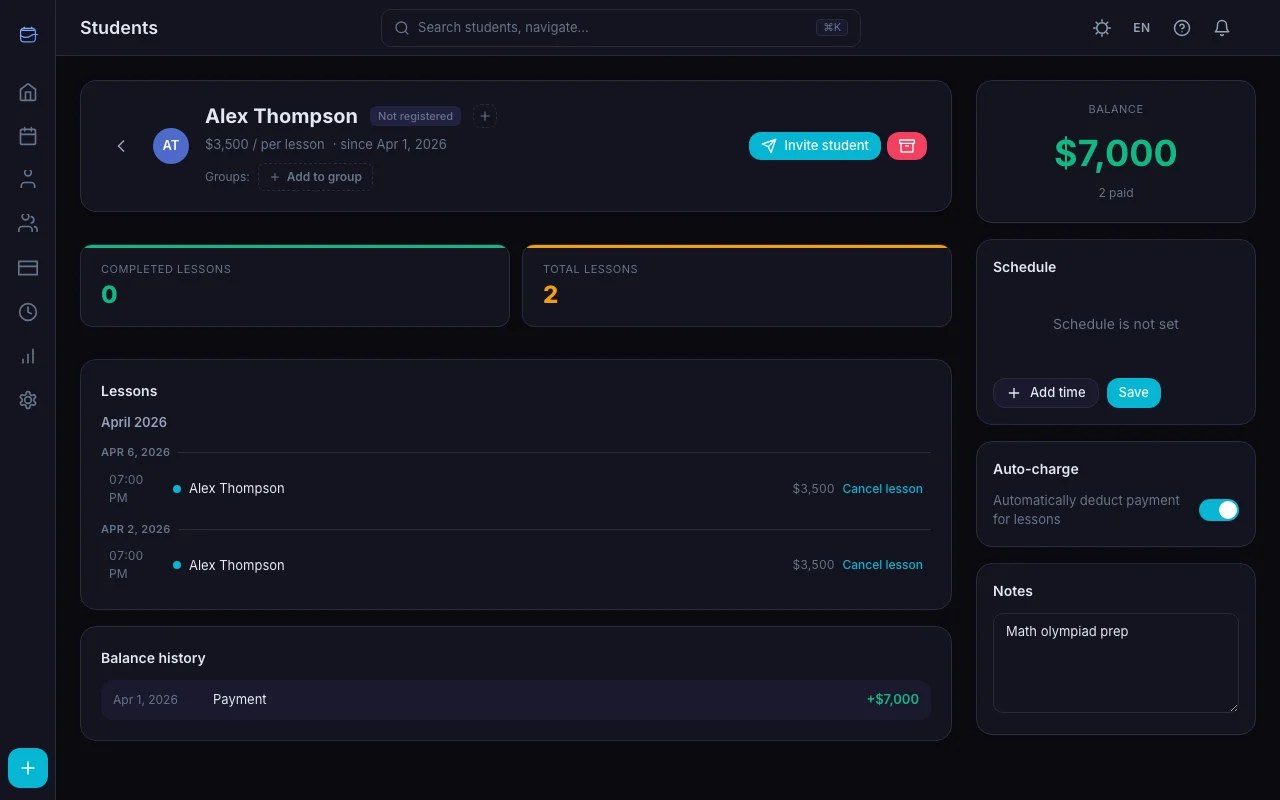
Step 2: Meet Your Dashboard
Once you're in, you'll see the Dashboard — your home base. It shows four key numbers at a glance:
- Active Students — how many students you currently teach
- Lessons This Month — all lessons in the current month (any status)
- This Month's Income — how much you've earned
- Pending Payments — students who owe you money
Below that: Today's Schedule (your lessons for the day) and Recent Activity (latest changes in your account).
The left sidebar gives you quick access to everything: Schedule, Students, Groups, Payments, History, Stats, and Settings.
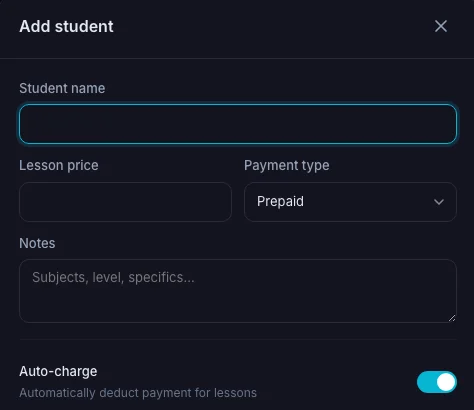
Step 3: Add Your First Student
Click Students in the sidebar, then click the + Add student card.
Fill in the basics:
- Name — your student's name (this is the only required field)
- Lesson price — how much you charge per lesson
- Payment type — subscription (fixed amount per period), per lesson (pay as you go), prepaid (pay in advance), or postpaid (pay after lessons)
- Notes — anything you want to remember (learning goals, contacts, etc.)
Two important toggles at the bottom:
- Auto Charge — automatically deducts from the student's balance when you complete a lesson. Leave this on — it saves time.
Click Save and your first student is ready.
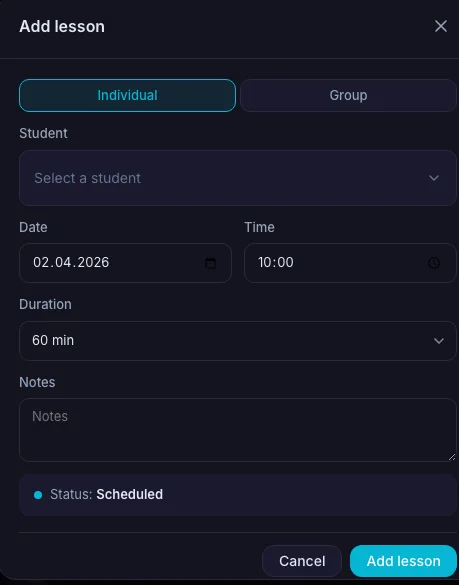
Step 4: Create Your First Lesson
Click Schedule in the sidebar to open the calendar. Click + Add lesson in the top right.
Choose:
- Type — Individual (one student) or Group
- Student — pick from your list
- Date and time — when the lesson happens
- Duration — 30, 45, 60, 90, or 120 minutes
Click Save. The lesson appears on your calendar immediately. If the date is in the future, it's marked as "Scheduled." If it's in the past, it's marked as "Completed."
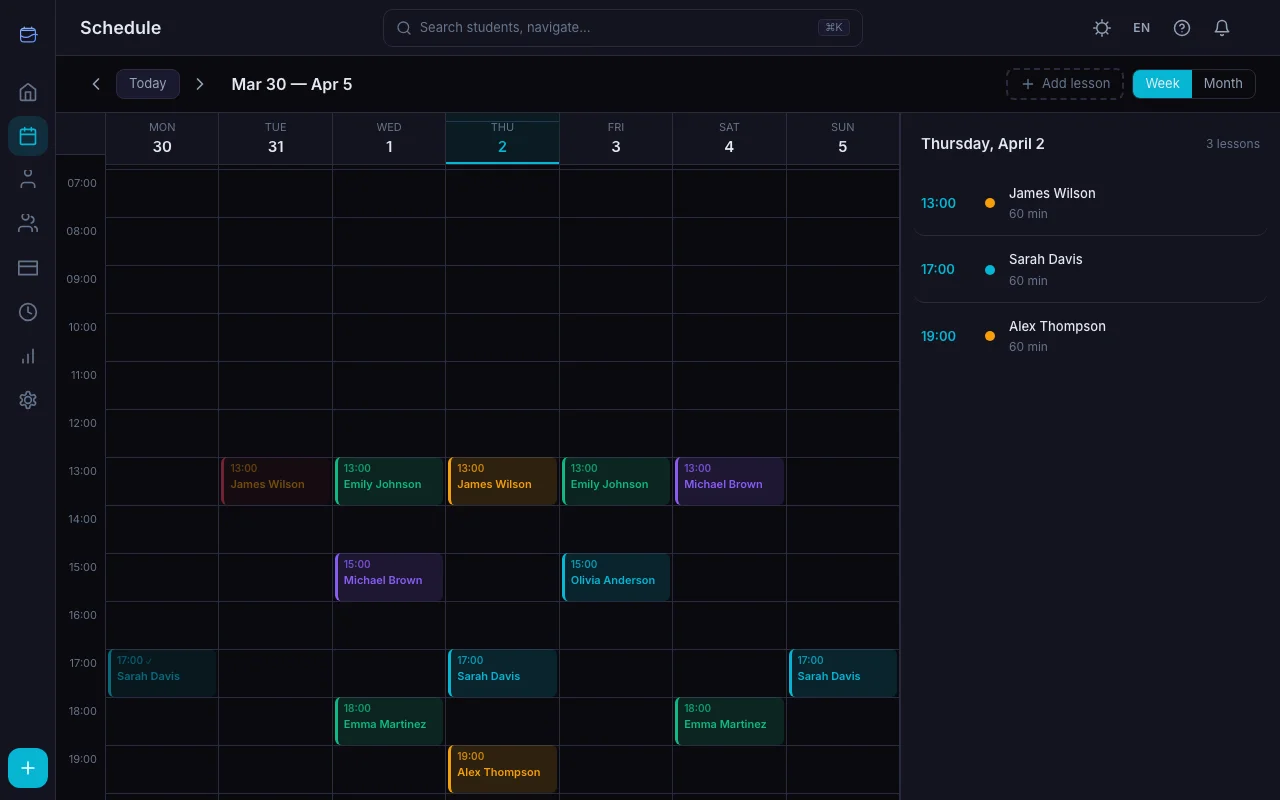
Step 5: Set Up Your Weekly Schedule
Go to Students, open a student's profile, and find the Schedule section. That's where you set recurring lesson slots.
Click Add slot for each time block you teach:
- Pick the weekday (Monday through Sunday)
- Set the start time
- Choose the duration
- Click Save
Add as many slots as you need. Your weekly template appears on the calendar, making it easy to fill in lessons.
What's Next?
You've got the basics down. Here's what to explore next:
- Invite your students — click "Invite" on any student card to send them a link. They'll get their own portal where they can see their schedule and confirm payments.
- Track payments — go to the Payments tab to record incoming payments and watch balances update automatically. Turn on Auto-Charge to deduct lesson costs without lifting a finger.
- Check your stats — the Stats page shows your revenue, lesson counts, and cancellation trends over time.
- Set up groups — teaching multiple students at once? Create a group and schedule group lessons.
- Tune notifications — control lesson reminders and payment reminders so nobody forgets a session or an invoice.
- Set up recurring lessons — stop creating the same lesson every week — let TeachersFlow generate them from your weekly schedule.
- Upgrade to Pro — when your 14-day trial ends, keep all the features you're using.
Try It Now
Open TeachersFlow and set up your account. 14 days of full Pro access — no card required. Five minutes is all it takes.